
Quest Game Optimizer: How to boost your Quest 3 resolution setup guide
I walk through Quest Games Optimizer (QGO) on the Meta Quest 3 — what it changes, how to install it, and the settings I tune first to push standalone games past their default render resolution.
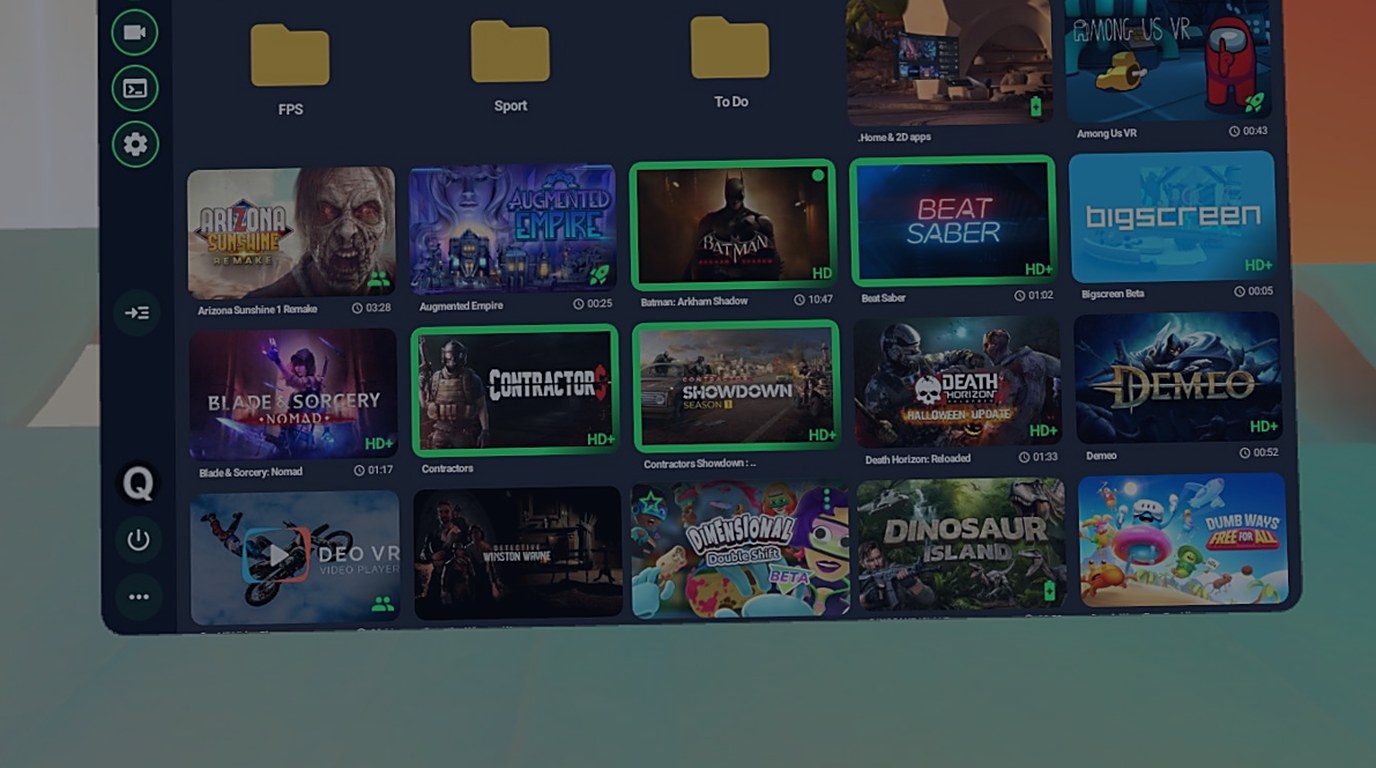
I’ve spent enough time on the Quest 3 to know the panel is the best part of the headset and the default rendering is the worst. Meta ships a 2064×2208 per-eye LCD running at 90 to 120 Hz, then lets most standalone games render well below that so they hold frame rate on the Snapdragon XR2 Gen 2. The result is a headset that looks razor-sharp in a screenshot and soft in motion. Quest Games Optimizer, or QGO, is the utility I reach for to close that gap, and after running it on my own Quest 3 I consider it the most effective tool for pulling real resolution out of standalone games.
Quest Games Optimizer — QGO to everyone who runs it — is a paid Android utility for standalone Meta Quest headsets, built by the independent developer Anagan79 and sold as a one-time purchase on itch.io. I’ll call it QGO from here.
What QGO actually does
QGO is a graphical front-end over the Android system properties Meta normally exposes only through ADB setprop commands. Instead of plugging into a PC and typing debug.oculus.textureWidth into a terminal, you get a per-game menu on the headset itself. It stores a profile for each title and launches the game with that profile already applied. The parameters it controls are the ones that decide how sharp a game looks and how smoothly it runs: app and render resolution, texture resolution, CPU and GPU clock levels, refresh rate, fixed-foveated-rendering level, and a few misc flags.
I like that it runs entirely on-device. Once a profile is set, the game opens in its optimized state without me touching a PC. Setup guides cite several hundred pre-loaded game profiles, while the store advertises a far larger count that keeps climbing — either way the profile library, not the tuning UI, is the real reason this beats hand-rolling ADB commands.
Why the Quest 3 needs it
The Quest 3’s Snapdragon XR2 Gen 2 pairs an Adreno 740 with 8 GB of LPDDR5, and the two LCD panels push 2064×2208 pixels per eye. That’s roughly a 30 percent per-eye resolution bump over the Quest 2’s 1832×1920. The catch is that a game’s default render target usually sits below native panel resolution to keep the GPU fed at 90 or 120 Hz, so the panel upscales a softer image. QGO lets me raise that render and texture resolution toward what the panel can actually display, trading GPU headroom for clarity.
Getting it installed
QGO is sideloaded, not bought from the Meta store. I bought my copy from the official Anagan79 itch.io page, and the community generally cites the price at $9.99 for a one-time license. The install methods I’ve seen documented are flexible: an automatic Windows installer, SideQuest, the Oculus Developer Hub, ADBLink, or the Bugjaeger app from an Android phone. If you want the sideloading mechanics, our SideQuest sideloading guide walks through enabling developer mode and authorizing a device, which is the same hurdle QGO needs.
The one non-negotiable step is that an ADB wireless connection has to be live to push the per-game CPU, GPU, texture, and refresh changes. That handshake is what lets QGO write the system properties without a cable every session. Once it’s on the headset, the workflow is simple: open QGO, pick a game from the profile list, and let it launch. For titles with a cloud or pre-built profile, the settings are already chosen.
What I tune first
When I open a game’s QGO profile on my Quest 3, I work top-down. These are the levers in the order I touch them:
- Render and texture resolution — this is the headline setting and where the sharpness comes from. I raise it until the game holds frame rate, then back off one step.
- GPU and CPU clock levels — when resolution alone isn’t enough or the game stutters, I push the clock levels up. This is the move that forces the clocks past Meta’s dynamic ceiling, and it’s where most of the real gain lives after resolution.
- Fixed-foveated-rendering level — dropping FFR a notch or two restores edge and periphery clarity without a full resolution hit, useful when battery matters more than center-screen crispness.
- Refresh rate — I keep 90 Hz as my baseline and think hard before going lower. If a game can’t hold 90 at higher resolution, I lower resolution before I lower refresh, because the panel’s smoothness is part of the Quest 3’s appeal.
- Misc flags and capture settings — last, because they’re game-specific and low-impact for clarity: launcher tweaks, RAM freeing, and the 3D 4K capture options if I’m recording.
The tradeoffs I plan around
Higher resolution and higher clock levels are not free. On my Quest 3 the cost shows up as faster battery drain and more heat at the front of the headset, and aggressive profiles can introduce instability in games that were already borderline. I’ve found that over-tuning a title I already enjoyed at defaults sometimes makes it worse, not better. QGO also bundles extras — FidelityFX CAS, Snapdragon Super Resolution, a PCVR boost mode, play-time tracking, APK installs, and high-bitrate 3D capture — but those are side features. My take is that anyone who cares about how standalone Quest 3 games actually look should own QGO, set a sane resolution bump on the titles they play most, and leave the rest on defaults until they have a reason to dig in. The panel is capable of an image the default rendering never reaches, and QGO is the shortest path I’ve found to make that panel show up in the games I already own.